
PhotoPharm
Resources
- Online Help File: http://themolitor.com/help/photopharm/
- Videos walk-throughs: http://youtube.com/themolitor/
- Support Forums: http://www.themolitor.com/forums/
- Customization Requests: http://themolitor.com/custom
- Theme Demo: http://themes.themolitor.com/photopharm/
- Handy Plugins:
- Contact Form 7: http://tinyurl.com/2hjj5x
- Display Widgets: http://tinyurl.com/y9wj8gs
- Twitter Widget Pro: http://tinyurl.com/ygzhxu2
Installation
- Download and unzip the folder from ThemeForest.
- Upload the theme folder (with the "style.css" file inside) to the themes directory of your blog, which is located within the wp-content directory.
- Activate the theme from your admin panel by navigating to "appearance" > "themes".
- NOTE: If you get a message like “stylesheet missing” (it isn’t) or “broken theme” (it’s not), please read this post: http://tinyurl.com/9x7mpvr
- Options will be accessible from “appearance” > “customize”.
Theme Options
Once finished installing theme, be sure to review the options available by navigating to “appearance” > “customize”.
Gallery
To create a gallery, simply upload images to a post or page and order them accordingly on the "gallery" tab in the pop-up window (see screenshot below, available after you upload images). NOTE: you DO NOT need to insert the images into the post. The theme will auto-detect if images are uploaded to the post/page.

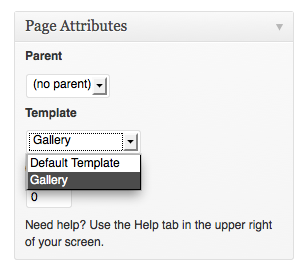
For pages, you can make the gallery appear first (instead of showing info tab) by using the "gallery" page template (see screenshot below).
Featured Post Images
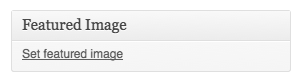
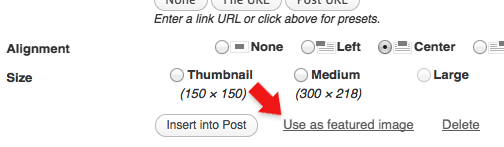
To feature images, use the “Featured Image” section on the lower right side of the post edit page (see screenshot below). After uploading the image, select "Use as featured image". When uploading an image, it automatically creates all the different sizes for you. For reference, featured images have a max width of 420px, but have an unlimited height.
Blog
To achieve the blog layout in the demo, simply create a category named "Blog" and add posts to that category. Navigate to the "menus" page and add the "Blog" category to the menu.
Home Page Welcome Message
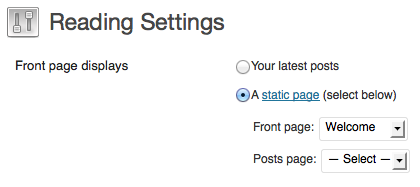
To create a welcome message on the home page, create a page and select it on the "reading settings" page under the "static page" drop down menu (see screenshot below).
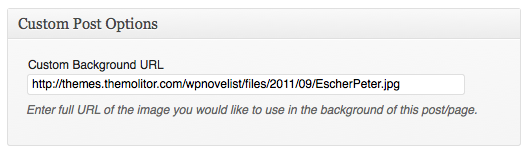
Custom Background Image
Below each post and page edit box is a section called “Custom Post Options”. This is where you will find the ability to customize the background.
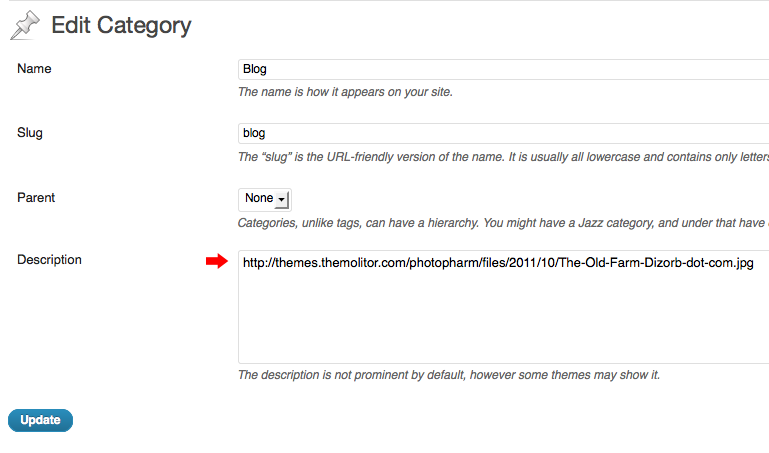
For category pages, you can paste the URL in the category description field (see below screenshot).
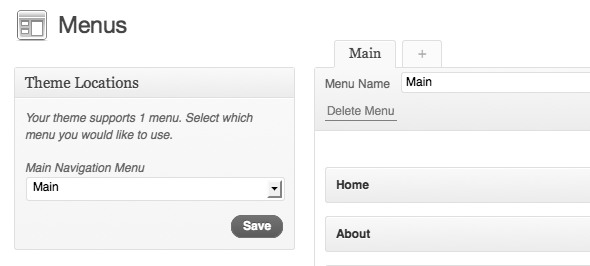
Navigation Menu
To create a menu, navigate to “Appearance” > “Menus” and create a new menu named “Main”. Assign this menu to the “Main Navigation Menu” in the drop down (see image below). For more information and instruction, watch the “Using WordPress 3.0 Menu System” video here: http://tinyurl.com/48dozan
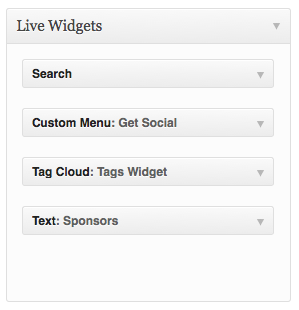
Widgets
The widgets section is controlled from the "widgets" page (under "appearance"). The “Live Widgets” section controls the widgets. With the way this theme is setup, each widget must have a title to display properly.
Comments
- Turn off comments site-wide:
- Navigate to "settings" > "discussion" and uncheck the allow comments box... http://tinyurl.com/4yqmndt
- Turn off comments for a specific post/page:
- Uncheck the box in the discussion panel... http://tinyurl.com/3sag9qq
- If you don't see this, you can turn it on by clicking "screen options" and checking the box to display discussion options... http://tinyurl.com/4ytetds
Image Lightbox
This theme uses PrettyPhoto as a lightbox system for images. You can make images show up with the light box by adding rel=”prettyPhoto” to the links. For more info, check out the PrettyPhoto website: http://www.no-margin-for-errors.com/projects/prettyphoto-jquery-lightbox-clone/
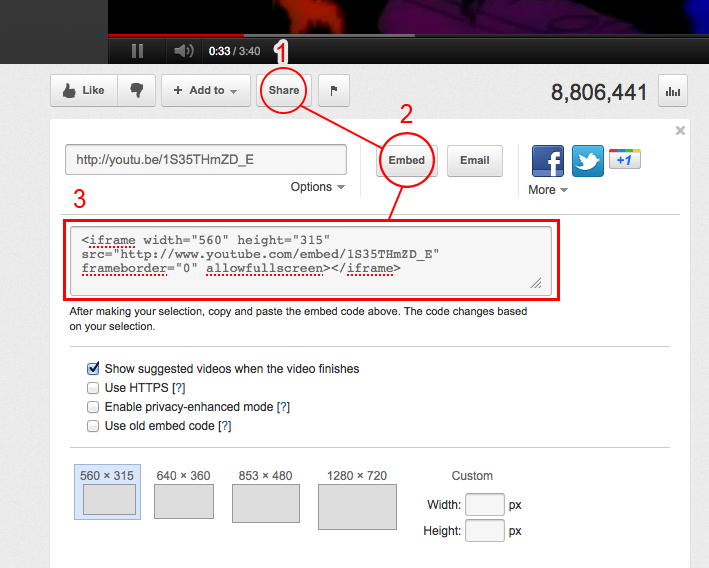
Embedding YouTube Videos
You can embed YouTube videos by pasting the embed code provided by YouTube (see screenshot) into the post content box. When you're dealing with raw code, make sure you're using the "HTML" tab (not the "visual") tab on the WordPress page/post edit screen.
JavaScript
This theme imports the following JavaScript files:
- jQuery: jQuery is a JavaScript library that greatly reduces the amount of code that you must write.
- Custom Scripts: The custom.js file provides some custom scripts for jQuery.
- Google Custom Font APIs: This script allows the theme to utilize Google’s custom font directory provided by google.com/webfonts
- Backstretch: This jQuery plugin allows full size background images.
- PrettyPhoto: PrettyPhoto is a lightbox system for images. You can make images show up with the light box by adding rel=”prettyPhoto” to the links. For more info, check out the PrettyPhoto website: http://www.no-margin-for-errors.com/projects/prettyphoto-jquery-lightbox-clone/
- Pace: adds progress indicator for loading animation.
PSD Files
The main PSD file, “photopharm.psd”, utilizes folders for organizing content. If you’re trying to edit a specific section, just locate the proper folder to find the layer.
Social icons can be edited from the “social.psd” file.
Changelog
v2.1.3 - Jan 2017
* Improved: General legibility of theme.
* Improved: Theme check compliance.

v2.1.2 - Jul 2015
* Fixed issue with Google Font Api Field.

v2.1.1 - Jun 2015
* Added: ZoomBox lightbox plugin zip file to files folder (optional).
* Removed: prettyPhoto lightbox plugin due to vulnerability.

v2.1.0 - May 2015
* Added support for WordPress 4.2 sidebar requirements
* General code improvements and optimizations

v2.0.0 - Mar 2014
* Added: fully responsive layout
* Improved: loading message indicates progress
* Improved: protected posts display password form instead of gallery
* Improved: general code improvements

v1.4.1 - Nov 2013
* Improved: Scrollbar functionality in Chrome.
* Improved: Theme options panel layout.
* Added: CSS styling for the email input field.

v1.4.0 - Sept 2013
* Added: WP Theme Customizer support (replaces OptionTree theme options panel).

v1.3.0 - Mar 2013
* Added: localization support.

v1.2.2 - Feb 2013
* Updated: theme options panel.

v1.2.1 - Nov 2012
* Updated: theme options panel appearance and updated/added support tab.

v1.2.0 - Aug 2012
* Added: Built-in theme options. Plugin no longer required.

v1.1.1 - Nov 2011
* Added: Light theme skin option

v1.0.1 - Nov 2011
* Fixed: Issue with iPhone/iPod layout.